
![]()
What is a custom product template?
Templates allow you to re-create a design using the editor and let your customer design his product from there. The tutorial below will teach you how to create a template and how to display them to the customer.
Before creating a template, make sure you’ve at least one customizable product. Each template is linked to a customizable product i.e. saying the templates depend on the product.
To create a template:
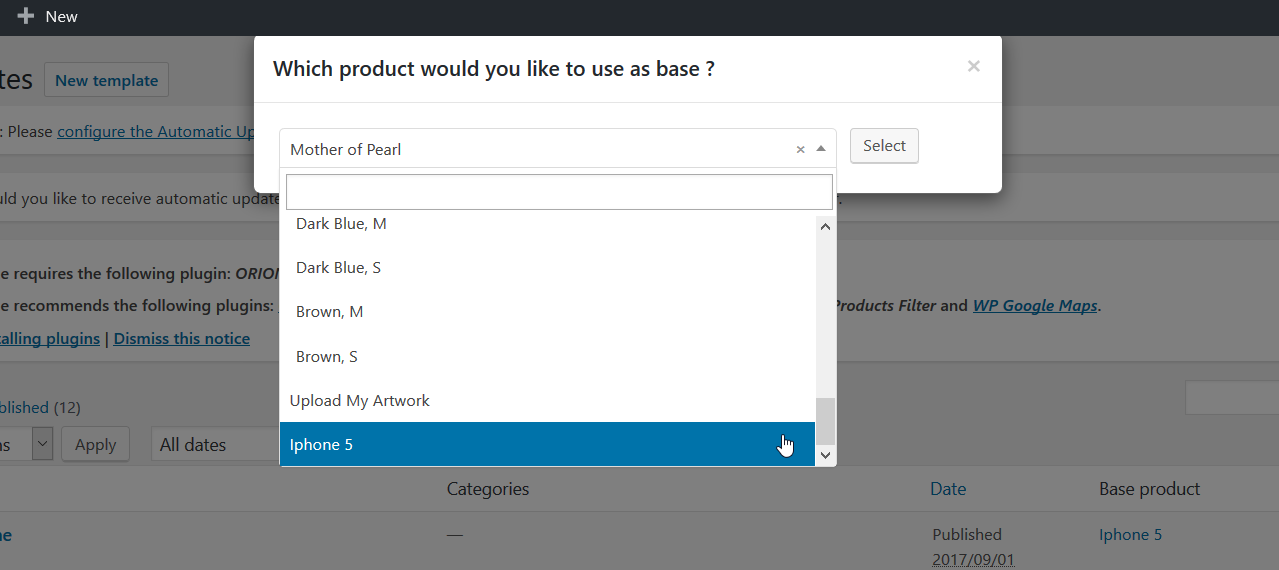
- Click on WPD > Templates. Then click on the New Template button to view your customizable products list (simple products and variations of variable products).

- Choose the template’s base product and then click on the Select button to access the template creation screen. A base product is a customizable product from which your template extracts the settings (parts, bounding boxes…).
- If you want to assign your template to a category, select the desired templates categories.

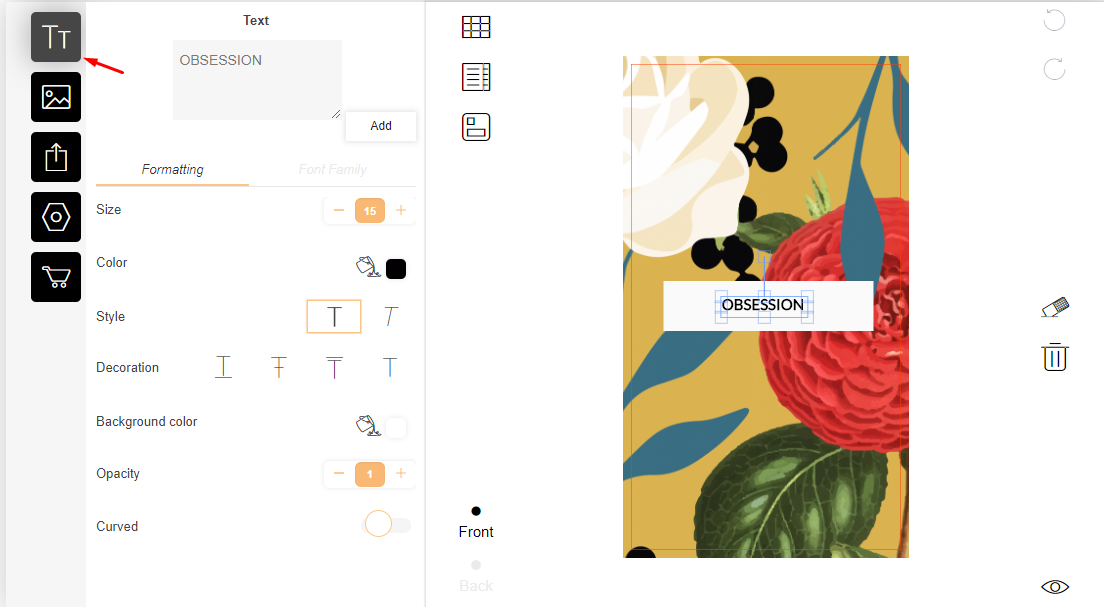
- The Text tab option allows you to add formats and features to your inserted text.
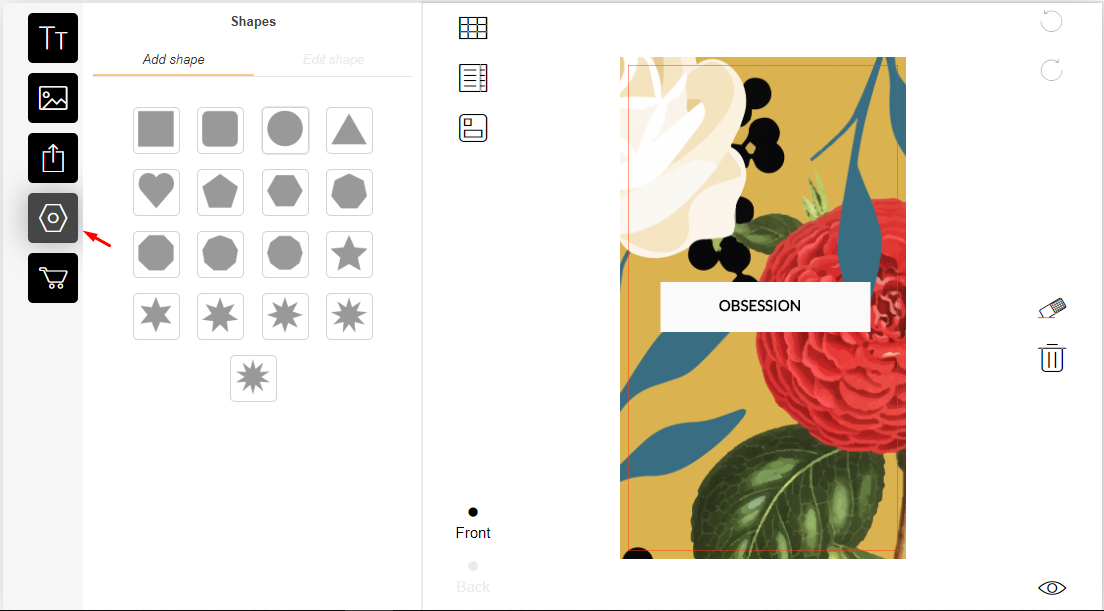
- The Shapes tab option allows you to insert shapes.
- The IMAGES/CLIPARTS tab option allows you to upload images or use your clipart.
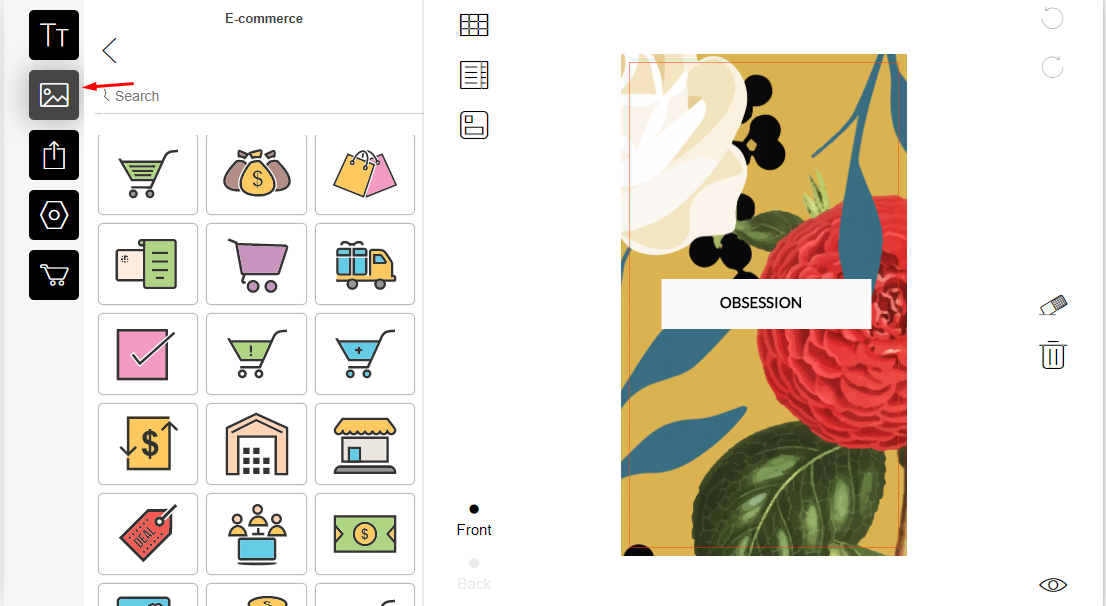
- Note: After inserting a shape and selecting the shape inserted, you will automatically be taken into the IMAGES/CLIPARTS tab to add color fills and features to the selected shape. In other to resize the shape, you will have to select the shape tab option while your inserted shape is selected.
- The Locking option gives the ability to lock the movement, resizing, or deletion of any inserted elements in the editor.
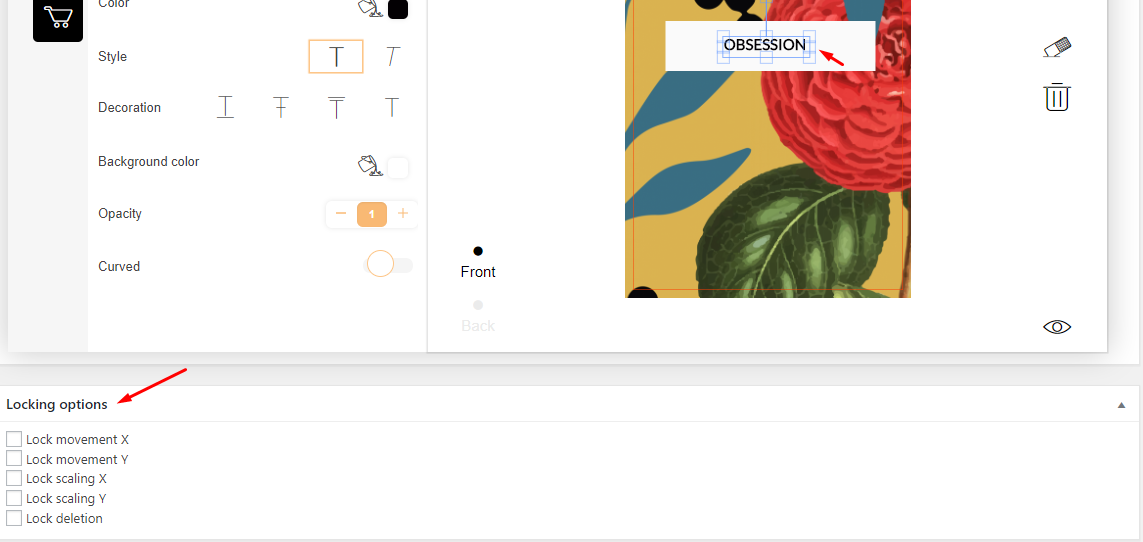 Note: To use the locking options you need to select an object on the design(text, shapes, image, cliparts, etc…) and then the locking options you will set would be about the currently selected object. To set the locking options in another object on the designer select the object and return to the locking options space and set the correct locking options.
 - Once the design is complete, click on the Publish button to save it.