
This tutorial is a step-by-step guide to teach you how to create a custom product on a WooCommerce store using the Ouidah WooCommerce Product Designer plugin.
A custom product configuration is a set of parameters that can be assigned to one or more WooCommerce products that regulate how they work. Assigning a custom product configuration to a normal WooCommerce product turns it into a customizable product.
The first step to making our product customizable is to create a configuration. A configuration is a set of options which once defined will allow our plugin to take charge of the process of customizing your product from the designer to the generation of printable output files.
Table of Contents
How to create a configuration
- Click on WPD > Configurations, to access the list of existing configurations.
- Next, click on New Configuration to have access to the page on which you can create a new configuration.
- Add a Configuration name.
- Certain WooCommerce-compatible themes allow the display of our Design from scratch and Custom design uploads buttons below customizable products on the product pages, these options allow you to decide to display (or not) the Design from scratch button and the Custom design uploads button on the WooCommerce product page.

- The dimensions you have just defined are not only the dimensions of your output files but also allow our plugin to define a customizable canvas whose dimensions will be proportional to that of your output files and on which your customers can customize the product. Choose your output files size right here.

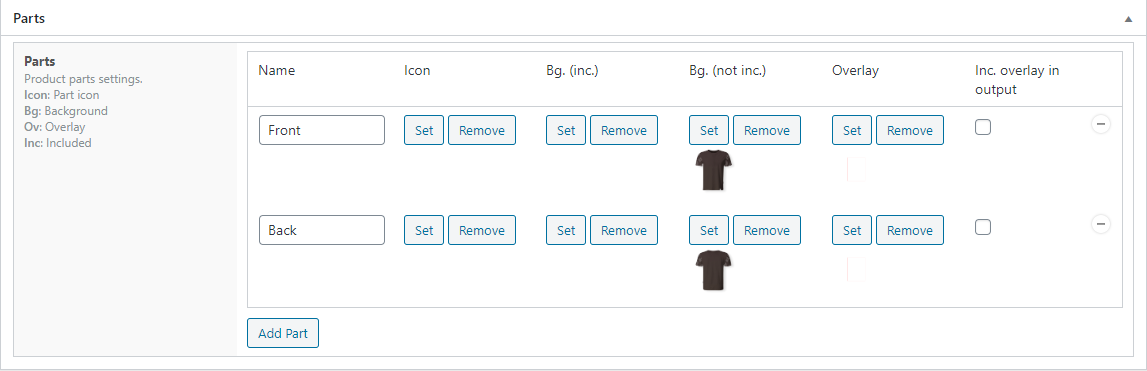
- The “Parts” are the components of your product that you want to make customizable. You will need to define the dimensions within which your customers can work. This also defines the output files so you can go directly to printing. The “Parts” section allows you to define the editable product parts or sections. Click on the “Add part” button to add your parts.
-
- Name: Name of your part
- Icon: This allows you to define an icon for the parts
- Bg. (not inc.): This allows you to define a background image for the parts. This image won’t be included in the final design.
- Bg. (inc.): This allows you to define a background image for the parts. This image will be included in the final design.
- Overlay image: This allows you to define an overlay image for the parts. This image can be selected to either be included or not in the final design.
-
Note: Note that it is imperative to choose images whose sizes are proportional to the dimensions of output files defined above as background included, background not included, or even image overlay so our plugin can easily scale them on the designer for a good rendering.
This is what your customers will see in the designer:
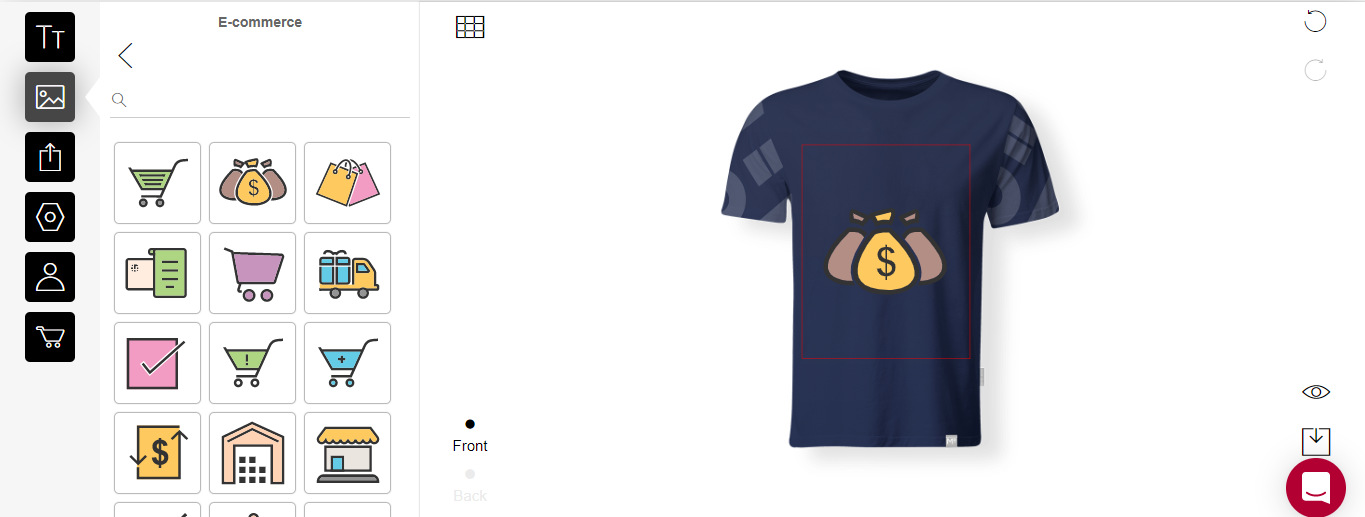
The front part on the shirt in the designer
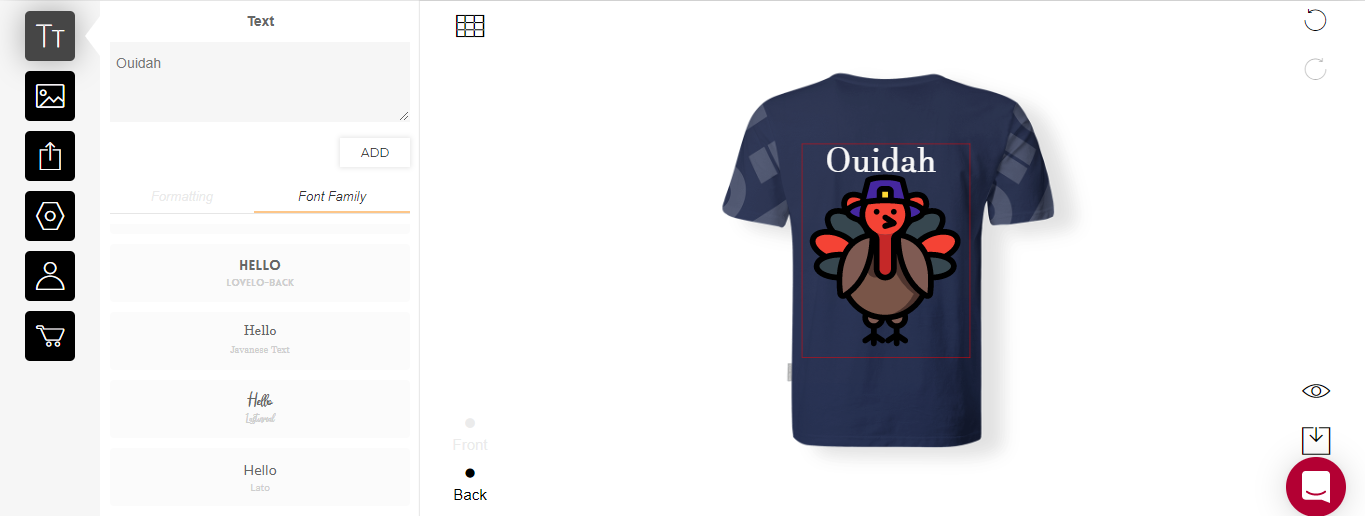
Back part of the shirt in the designer
How to assign a configuration to a WooCommerce product?
Once the configuration is created, we’ll assign it to a product to make the product customizable.
- For a new product, click on Products > Add New to access the product creation screen.
- Enter your product name.

- Select the product type (only simple and variable products are supported at this time).
For simple products:
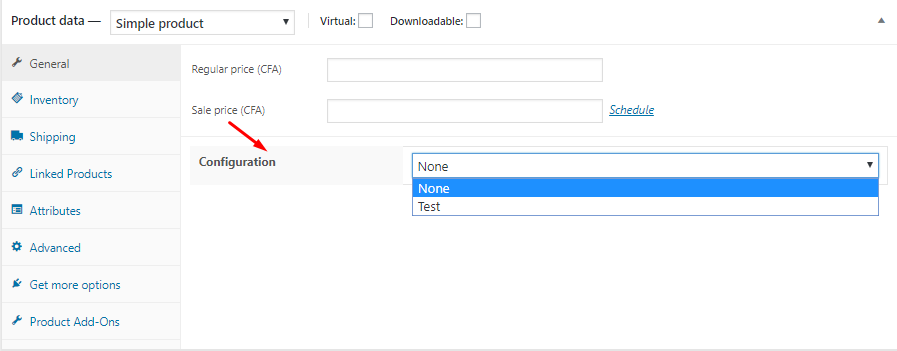
- Enter product price (note that the price is mandatory for the product to be customizable, even the value ‘zero’).
- Now select the previously created configuration.
- Publish your product.
For variable products:
- In the product creation view, select “variable product” as product data.
- Click on the “variations” tab.
- Select the variations you want to configure.
- Enter “variation price”.
- Now select the corresponding configuration previously created.
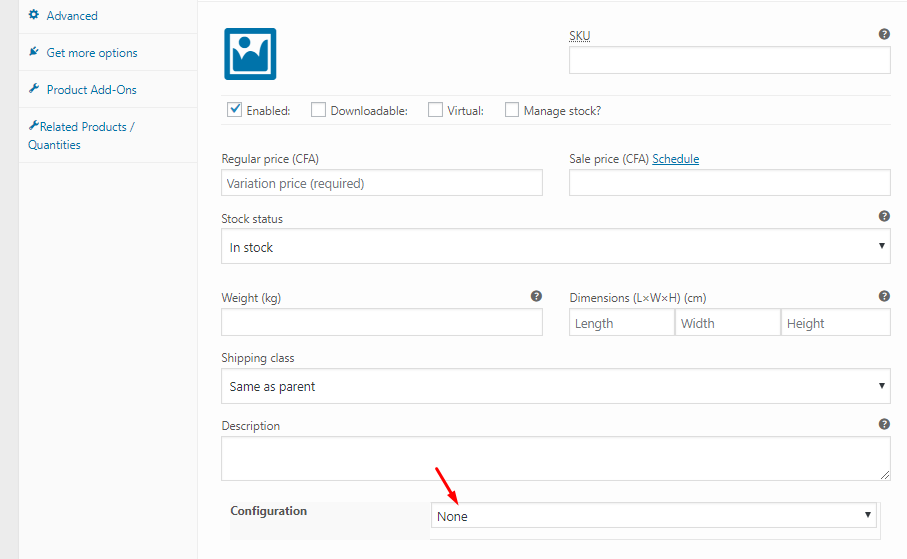
- Publish your product.
Q: How can a customer customize a product?
Once a product has been set as customizable, there are 2 ways for customers to customize it:
- From the shop page (simple products only): a Design from scratch button will appear under the Add to cart button. A click on it will lead the user to the editor page with the product data you previously created already loaded.
- From the product page: a Design from scratch button will appear under the Add to cart button. A click on it will lead the user to the editor page with the product data already loaded. For variable products, selecting the right option will lead to the right configuration when you click the Design from scratch button.
Q: Can I add a configuration to an existing product?
Yes, the configuration field appears in existing Woocommerce products as well. However, the existing Woocommerce product must either be a simple or variable product.
You can follow the steps above for either product type, to add the configuration.
Q: Will this work for themes that do not have any reference to WooCommerce?
This works for WooCommerce-enabled themes. It also works for themes that do not have any reference to WooCommerce. If the theme the customer is using is a WooCommerce compatible theme or a custom theme, and all hooks are properly triggered, then all buttons will appear. If not, then troubleshoot and verify that all hooks are properly triggered in the theme.
Bonjour,
Je suis en train de terminer la configuration du plugin et je rencontre ce message d’erreur lors de l’ajout au panier : A problem occured while adding the product to the cart. Please try again.
Est ce que vous pouvez m’aider svp
Bonjour, ce problème a été réglé dans notre dernière version, veuillez juste télécharger et installer la dernière version disponible depuis votre compte.Merci