

Fonts are one of the most basic features in online product customization and yet one of the most critical ones. WooCommerce Product Designer does not only allow you to use google fonts in your designs but also to add custom TTF fonts which you can use directly on the canvas and in the output PDF files. This tutorial will teach you everything you need to know about the fonts feature in WooCommerce Product Designer.
The fonts interface allows you to define which fonts you would like your clients to use when adding text to their designs. If you don’t define any font, the system default fonts will be used.
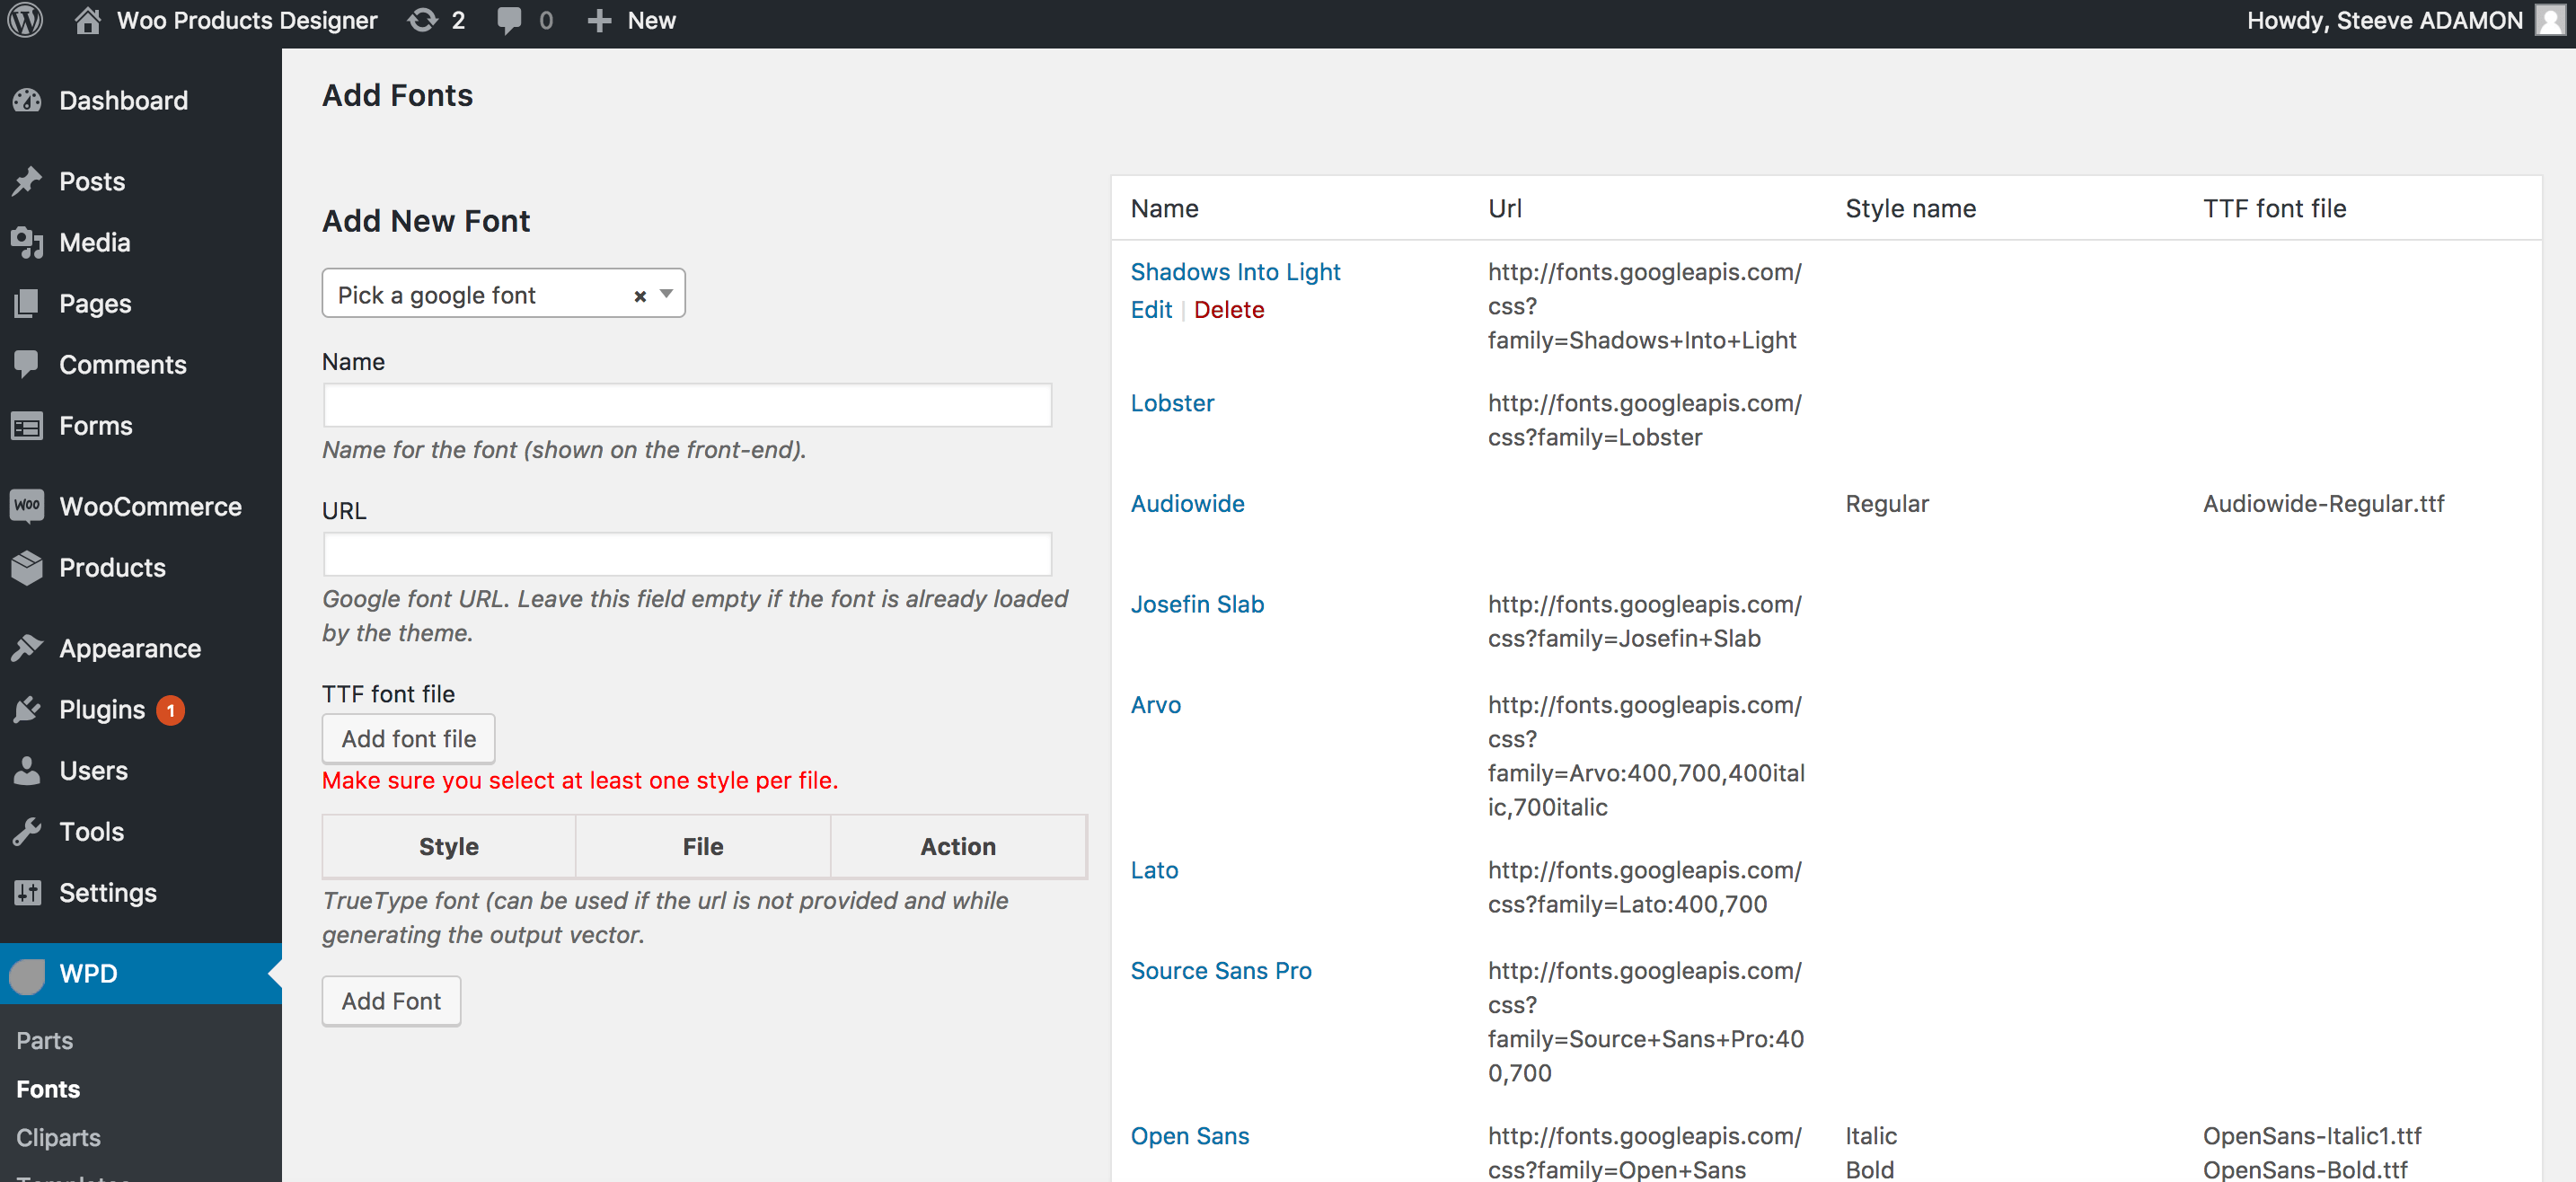
To manage the fonts, go to WPD > Fonts to access the fonts list.
How to add Google Fonts in WooCommerce Products Designer
Google Fonts are one of the most popular and free web fonts libraries in the world. To add a Google font:
- Click on the fonts dropdown in order to select the one you want.
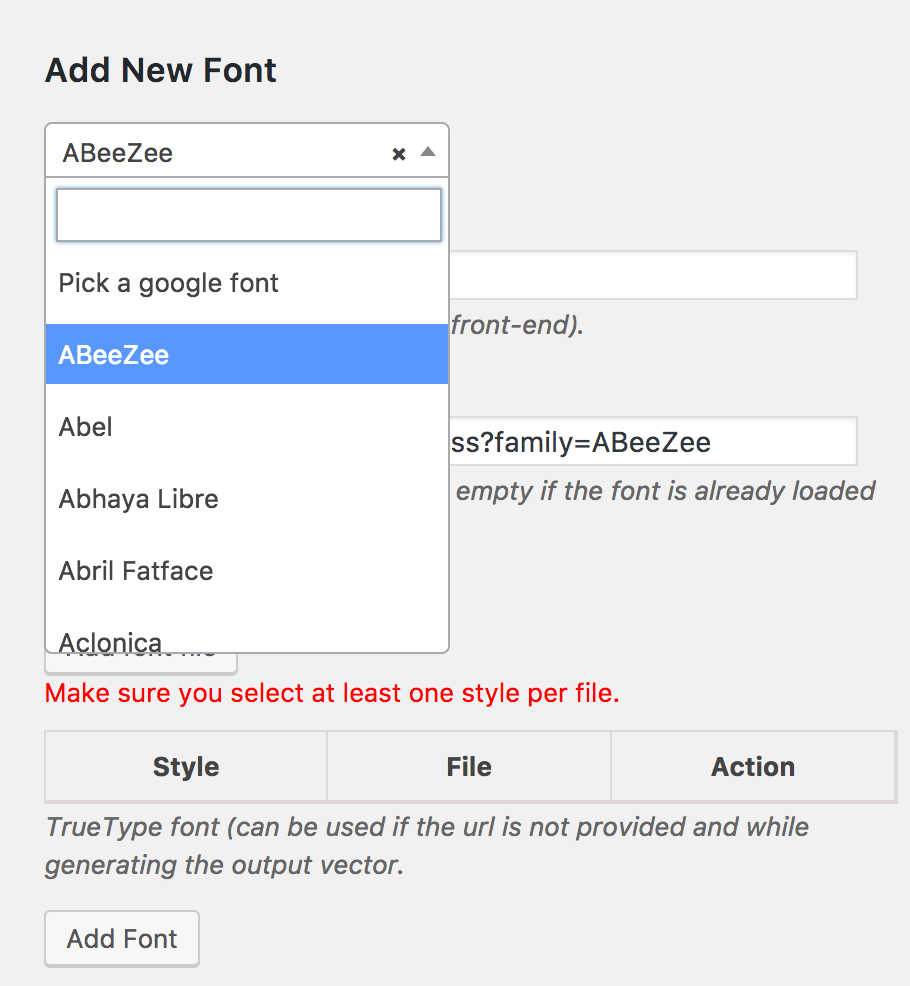
2. You’ll need to define the TTF fonts which will be needed to be used in the output files. We will talk about it in the third section of this tutorial.
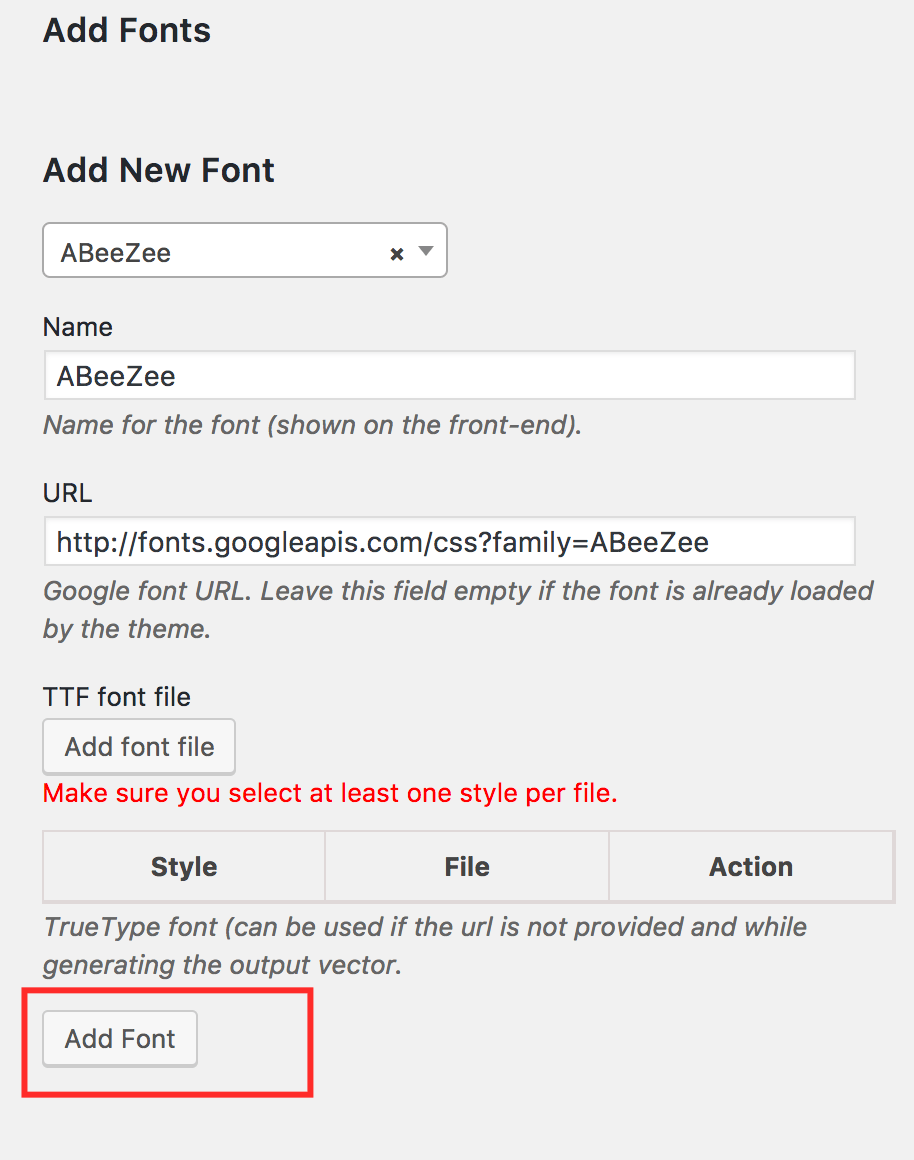
3. Click on the Add Font button to save your newly selected font into the product designer.
How to add custom web fonts in WooCommerce Product Designer?
- Enter the font name in the name field.
- Enter the font css file URL in the URL field.
- You’ll need to define the TTF fonts that will need to be used in the output files but we’ll get back to it in the third section of this tutorial.
- Click on the Add Font button to save your newly selected font into the product designer.
How to add TTF fonts in WooCommerce Product Designer?
Custom TTF fonts are also supported by the custom product designer. In order to add a TTF file:
- Go here https://transfonter.org/ to convert your TTF file to a web ready file. This will make sure your file can be read by any browser.
- Enter the font name in the name field.
- Leave the URL field empty.
- Click on the Add font file button to select the converted TTF file from the step 1 related to the font you’re trying to add using wordpress’s default media uploader.
- Each TTF file contains one or multiple font styles such as italic, bold and other. You need to make sure the TTF font file you just set has all it’s styles properly checked. For example, the ALEO font comes in multiple files such as:
- Regular
- Regular Italic
- Bold
- Bold Italic
While defining the font files, you’ll need to make sure that the “regular” ttf file has only the regular style checked. Then the “Regular Italic” will have both styles checked and so on.
Click on the Add Font button to save your newly selected font into the product designer.
This completes our tutorial. If you have any questions, use the comments section to ask.
I have been using this plugin for some time now, but on occasions the custom font (TTF) added for my artwork doenst pull through, with the PDF sent through with all editable fonts showing in times new roman.
Is this an issue that has occured before and if so is there a fix to this issue?
Hello Neil,
Thank you for your comment. Please start a chat on our site explaining your issue, a competent person will answer you.
Thanks