

The goal of this tutorial is to help you define a custom pricing strategy for your products. Being able to flexibly define your prices tailored to each product is one of the features of the lettering and signs designer plugin.
In order to better understand how this works, let’s proceed with an example. Our pricing strategy is defined as follow:
- if the surface of the image is superior to 5000, add 10$ to the total price of the design.
- if the font used is “lobster” add 30$ to the total price
- if the number of characters in the text is superior to 5, charge 1$ by character
- and if the space between characters is superior to 4, add 5$ to the total price.
How to create your pricing table?
Based on the pricing strategy example mentioned above, we will proceed step by step.
The first rule is: if the surface of the image is superior to 5000, add 10$ to the total price of the design. This rule simply means that if canvas width x canvas height is higher than “5000”, 10$ should be added to the whole design’s price.
In order to create this rule:
- go to the “pricing rules” section of the configuration assigned to the product you wish to edit.
- In the parameter dropdown (1), choose the option “if canvas square unit (WxH)”
- Next, go to the operator dropdown (2). Here, choose “more than”. if you want the value specified in the next step to be included in the rule, make sure to select the operator “more or equals to”.
- the next step is to define the value to which the canvas square unit (or canvas width x canvas height ) will be compared. Type “5000” in the value field (3).
- You will now need to define the price to be added to the total design price in the price box (4). Type in “10”
- The last step to complete our rule is to specify the scope of that rule. the scope dropdown (5), select “On whole design” to make sure that rule applies on the whole design‘s price.

Reproduce the steps defined above to all the rules of our example and you will get a table such as the following one:
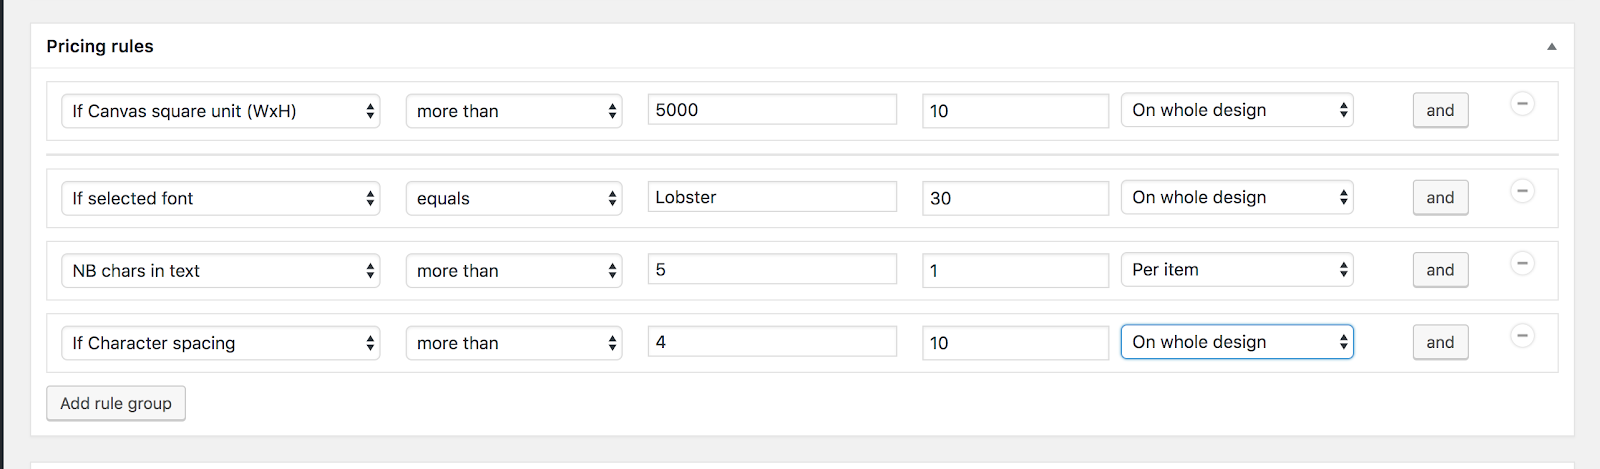
After defining all this sections, click on “save” to save your changes.
Simple and quick, this is how to define your pricing table strategy using the lettering and signs designer plugin.